How to install/remove different Desktop Environments or Window Manager in Kali Linux 1.x
 An X window manager is a window manager which runs on top of the X Window System, a windowing system mainly used on Unix-likesystems.Unlike the Mac OS (Apple Macintosh) and Microsoft Windows platforms (excepting Microsoft Windows explorer.exe shell replacements) which have historically provided a vendor-controlled, fixed set of ways to control how windows and panes display on a screen, and how the user may interact with them, window management for the X Window System was deliberately kept separate from the software providing the graphical display. The user can choose between various third-party window managers, which differ from one another in several ways, including:

Olivier Fourdan started the project in 1996. The name “Xfce” originally stood for “XForms Common Environment”, but since that time Xfce has been rewritten twice and no longer uses the XForms toolkit. The name survived, but it is no longer capitalized as “XFCE”, but rather as “Xfce”. The developers’ current stance is that the initialism no longer stands for anything specific. It has been nicknamed “Cholesterol Free Desktop Environment”, even in some of its man pages.
 GNOME is a desktop environment and graphical user interface that runs on top of a computer operating system. It is composed entirely of free and open source software and is developed by both volunteers and paid contributors, the largest corporate contributor being Red Hat. It is an international project that includes creating software development frameworks, selecting application software for the desktop, and working on the programs that manage application launching, file handling, and window and task management.
Permanently Switch Desktop Environments
- Customizability of appearance and functionality:
- textual m
- enus used to start programs and/or change options
- docks and other graphical ways to start programs
- multiple desktops and virtual desktops (desktops larger than the physical monitor size), and pagers to switch between them
- Consumption of memory and other system resources
- Degree of integration with a desktop environment, which provides a more complete interface to the operating system, and provides a range of integrated utilities and applications.
Schema of the layers of the graphical user interface

How to install/remove XFCE Desktop Environment in Kali Linux
How to install/remove different KDE Desktop Environments in Kali Linux
How to install/remove LXDE Desktop Environment in Kali Linux
How to install/remove GNOME Desktop Environment on Kali Linux
How to install/remove Cinnamon Desktop Environment in Kali Linux
How to install/remove MATE Desktop Environment in Kali Linux
Install/remove XFCE Desktop Environment in Kali Linux
How to install/remove XFCE Desktop Environment in Kali Linux
XFCE is a free software desktop environment for Unix and Unix-like platforms, such as Linux, Solaris, and BSD. It aims to be fast and lightweight, while still being visually appealing and easy to use. It consists of separately packaged components that together provide the full functionality of the desktop environment, but which can be selected in subsets to create the user’s preferred personal working environment.

XFCE Desktop
How to install XFCE Desktop Environment in Kali Linux
Use the following command to install XFCE Desktop Environment including all required plugins and goodies.
How to remove XFCE in Kali Linux
In case you want to remove XFCE, use the following command.
How to install/remove different KDE Desktop Environments in Kali Linux
K Desktop Environment (KDE) was founded in 1996 by Matthias Ettrich, who was then a student at the Eberhard Karls University of Tübingen. At the time, he was troubled by certain aspects of the Unix desktop. Among his concerns was that none of the applications looked, felt, or worked alike. He proposed the creation of not merely a set of applications but a desktop environment in which users could expect things to look, feel, and work consistently. He also wanted to make this desktop easy to use; one of his complaints about desktop applications of the time was that his girlfriend could not use them. His initial Usenet post spurred a lot of interest, and the KDE project was born.The name KDE was intended as a wordplay on the existing Common Desktop Environment, available for Unix systems. CDE was an X11-based user environment jointly developed by HP, IBM, and Sun through the X/Open consortium, with an interface and productivity tools based on the Motif graphical widget toolkit. It was supposed to be an intuitively easy-to-use desktop computer environment. The K was originally suggested to stand for “Kool”, but it was quickly decided that the K should stand for nothing in particular. The KDE initialism is therefore expanded to “K Desktop Environment”.

KDE Desktop
How to install KDE Plasma Desktop Environment in Kali Linux:
How to install Netbook KDE Plasma Desktop Environment in Kali Linux:
How to install Standard Debian selected packages and frameworks in Kali Linux:
# How to install KDE Full Install in Kali Linux:
# How to remove KDE on Kali Linux:
KDE Desktop
How to install KDE Plasma Desktop Environment in Kali Linux:
How to install/remove LXDE Desktop Environment in Kali Linux
 LXDE is a free and open source desktop environment for Unix and other POSIX compliant platforms, such as Linux or BSD. The goal of the project is to provide a desktop environment that is fast and energy efficient. The name LXDE stands for “Lightweight X11 Desktop Environment”.
LXDE is designed to work well with computers on the low end of the performance spectrum such as older resource-constrained machines, especially those with low amounts of RAM. In 2010, tests suggested that LXDE 0.5 had the lowest memory usage of the 4 most popular desktop environments of the time (GNOME 2.29, KDE Plasma Desktop 4.4, and Xfce 4.6), and that it consumed less energy, which suggests mobile computers with LXDE 0.5 drained their battery at a slower pace than those with other desktop environments.
LXDE is the default desktop environment of Knoppix, Lubuntu and Raspbian, among others.
LXDE is written in the C programming language, using the GTK+ toolkit, and runs on Unix and other POSIX compliant platforms, such as Linux and BSD. GTK+ is commonly used in many Linux distributions and allows applications to run on different platforms. LXDE uses rolling releases for the individual components (or group of components with coupled dependencies). Its window manager is Openbox. LXDE includes GPL licensed code as well as LGPL licensed code.
LXDE Desktop
How to install LXDE Desktop Environment in Kali Linux:
How to remove LXDE on Kali Linux:
How to install/remove GNOME Desktop Environment on Kali Linux

Initially, “GNOME” was an acronym of GNU Network Object Model Environment, referring to the original intention of creating a distributed object framework similar to Microsoft’s OLE; it was dropped, because this no longer reflects the core vision of the GNOME project.
The GNOME project provides two things: The GNOME desktop environment, a graphical user interface and core applications like Web, a simple web browser; and the GNOME development platform, an extensive framework for building applications that integrate into the rest of the desktop and mobile user interface..
How to install GNOME Desktop Environment on Kali Linux
How to install GNOME Desktop Environment on Kali Linux
How to remove GNOME Desktop Environment on Kali Linux
How to install/remove Cinnamon Desktop Environment in Kali Linux
Cinnamon is a GTK+-based desktop environment. It originally started as a fork of the GNOME Shell, which is a user interface, and was initially developed by (and for) Linux Mint.
 The Linux Mint development team was initially unsure about the future of the distribution after the release of GNOME 3. Its new interface, GNOME Shell, did not fit the design goals the team had in mind for Linux Mint, but there were initially no available alternatives. Linux Mint 11 “Katya” was released in May 2011 with the final release of GNOME 2, but it was clear that a better solution was needed, as GNOME Panel was no longer being developed. Therefore, the team set out to improve GNOME Shell so that it would fit Linux Mint’s goals, and the result was the “Mint GNOME Shell Extensions” (MGSE). In the meantime, the MATE desktop environment was forked from GNOME 2. The Mint team decided to incorporate MATE into Linux Mint 12 “Lisa” alongside MGSE, to give users a choice whether to use the traditional GNOME 2 desktop or the GNOME 3-based MGSE.
However, MGSE fell short of expectations. Since GNOME Shell was going in a different direction than the Mint developers had in mind, it was clear that MGSE was not viable in the long run. In response to this problem, GNOME Shell was forked to create the Cinnamon project, allowing the Linux Mint developers better control over the development process and to implement their own vision of the GNOME interface for use in future releases of Linux Mint. The project was publicly announced on 2 January 2012 on the Linux Mint blog.
From version 1.2 onward, Cinnamon uses Muffin, a fork of the GNOME 3 window manager Mutter, as its window manager.
Cinnamon 1.6 was introduced on 18 September 2012 with new default file browser Nemo replacing Nautilus, although Nautilus is still optional.
Cinnamon 1.8 was released on 5 May 2013. Gnome-Control-Center has been forked. It is now called Cinnamon-Control-Center and it combines Gnome-Control-Center and Cinnamon-Settings. Gnome-Screensaver has been also forked and is now called Cinnamon-Screensaver. Now there is possibility to install and update applets, extensions, desklets and themes through control-center instead of placing example themes to .themes folder. It also feature modified Nemo interface. Desklets that come with release are like Widgets.
Cinnamon 2.0 was released on 10 October 2013. From this version, Cinnamon is no longer a frontend on top of the GNOME desktop like Unity or GNOME Shell, but “an entire desktop environment”. Cinnamon is still built on GNOME technologies and uses GTK+, but it no longer requires GNOME itself to be installed. Biggest changes in this release are improved edge-tiling, improved user management, configurable individual sound effects and performance improvements for full screen applications. Source: Wikipedia
The Linux Mint development team was initially unsure about the future of the distribution after the release of GNOME 3. Its new interface, GNOME Shell, did not fit the design goals the team had in mind for Linux Mint, but there were initially no available alternatives. Linux Mint 11 “Katya” was released in May 2011 with the final release of GNOME 2, but it was clear that a better solution was needed, as GNOME Panel was no longer being developed. Therefore, the team set out to improve GNOME Shell so that it would fit Linux Mint’s goals, and the result was the “Mint GNOME Shell Extensions” (MGSE). In the meantime, the MATE desktop environment was forked from GNOME 2. The Mint team decided to incorporate MATE into Linux Mint 12 “Lisa” alongside MGSE, to give users a choice whether to use the traditional GNOME 2 desktop or the GNOME 3-based MGSE.
However, MGSE fell short of expectations. Since GNOME Shell was going in a different direction than the Mint developers had in mind, it was clear that MGSE was not viable in the long run. In response to this problem, GNOME Shell was forked to create the Cinnamon project, allowing the Linux Mint developers better control over the development process and to implement their own vision of the GNOME interface for use in future releases of Linux Mint. The project was publicly announced on 2 January 2012 on the Linux Mint blog.
From version 1.2 onward, Cinnamon uses Muffin, a fork of the GNOME 3 window manager Mutter, as its window manager.
Cinnamon 1.6 was introduced on 18 September 2012 with new default file browser Nemo replacing Nautilus, although Nautilus is still optional.
Cinnamon 1.8 was released on 5 May 2013. Gnome-Control-Center has been forked. It is now called Cinnamon-Control-Center and it combines Gnome-Control-Center and Cinnamon-Settings. Gnome-Screensaver has been also forked and is now called Cinnamon-Screensaver. Now there is possibility to install and update applets, extensions, desklets and themes through control-center instead of placing example themes to .themes folder. It also feature modified Nemo interface. Desklets that come with release are like Widgets.
Cinnamon 2.0 was released on 10 October 2013. From this version, Cinnamon is no longer a frontend on top of the GNOME desktop like Unity or GNOME Shell, but “an entire desktop environment”. Cinnamon is still built on GNOME technologies and uses GTK+, but it no longer requires GNOME itself to be installed. Biggest changes in this release are improved edge-tiling, improved user management, configurable individual sound effects and performance improvements for full screen applications. Source: Wikipedia
Cinnamon Desktop
How to install Cinnamon Desktop Environment in Kali Linux
Cinnamon Desktop
How to install Cinnamon Desktop Environment in Kali Linux
How to remove Cinnamon Desktop Environment in Kali Linux:
How to install/remove MATE Desktop Environment in Kali Linux
MATE is a fork of GNOME 2. It provides an intuitive and attractive desktop environment using traditional metaphors for Linux and other Unix-like operating systems.
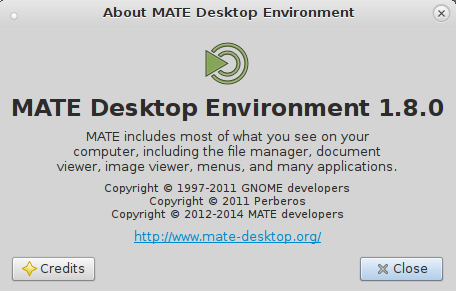 MATE is under active development to add support for new technologies while preserving a traditional desktop experience. See the Roadmap or Stefano’s presentation at the OpenSUSE conference to find out more about how MATE has evolved and what is planned for the future. TheMATE Manifesto outlines some of the principles that guide the project.
GNOME 3 replaced the classic desktop metaphor; this concept design is realized through its native user interface: GNOME Shell. It led to some criticism from theLinux community. Many users refused to accept the new interface design of GNOME and called for someone to continue development of GNOME 2. The MATE project was started by an Arch Linux user in order to fulfill this task.
How to install MATE Desktop Environment in Kali Linux
At first we add the correct Debian repo and install the Keyrings.
MATE is under active development to add support for new technologies while preserving a traditional desktop experience. See the Roadmap or Stefano’s presentation at the OpenSUSE conference to find out more about how MATE has evolved and what is planned for the future. TheMATE Manifesto outlines some of the principles that guide the project.
GNOME 3 replaced the classic desktop metaphor; this concept design is realized through its native user interface: GNOME Shell. It led to some criticism from theLinux community. Many users refused to accept the new interface design of GNOME and called for someone to continue development of GNOME 2. The MATE project was started by an Arch Linux user in order to fulfill this task.
How to install MATE Desktop Environment in Kali Linux
At first we add the correct Debian repo and install the Keyrings.

How to install MATE Desktop Environment in Kali Linux
At first we add the correct Debian repo and install the Keyrings.Install base MATE Desktop Packages
Following command installs the base packages
(or) Install MATE Desktop Packages with extras
Following command installs mate-core and more extras
(or) Install MATE Desktop Packages with even more extras
Following command installs mate-core + mate-desktop-environment and even more extras.
How to remove MATE Desktop Environment in Kali Linux
In case you want to remove MATE Desktop, use the following command:
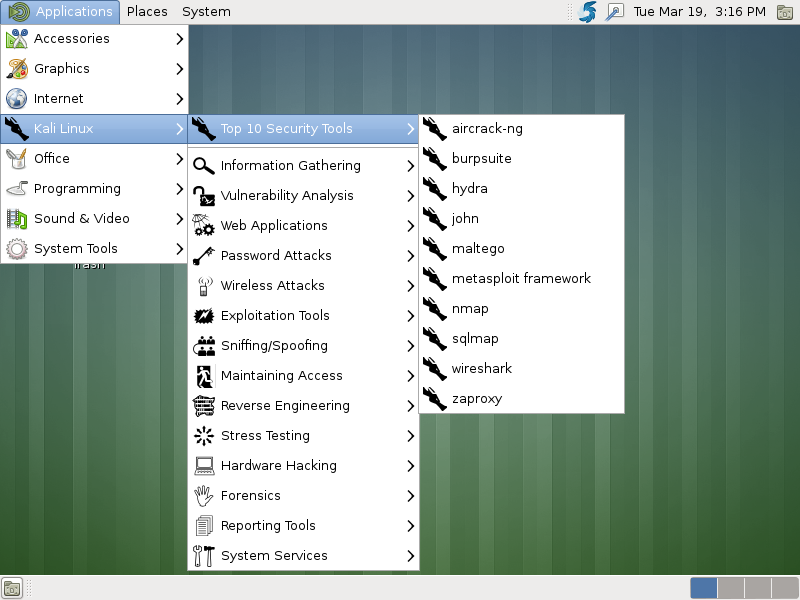
Now the only problem is MATE doesn’t show the nice Kali Linux Menu.
How to Fix Kali Linux Menu in MATE Desktop
To fix Kali Linux Menu in MATE Desktop, edit the following file.
In the file go down to the section named Internet and add the following line:
So it should look something like this
Now save the file, Logout and Login back. The “Kali Linux” menu should display fine in Mate desktop’s application menu.
This guide will explain how to Permanently Switching Desktop Environments in Kali Linux.
This guide will explain how to Permanently Switching Desktop Environments in Kali Linux.
Permanently Switch Desktop Environments
Use the following to make a selected Desktop Environment your primary one (i.e. Make Gnome or KDE etc. your default desktop environment.)
Explanation
Use the following to make a selected Desktop Environment your primary one (i.e. Make Gnome or KDE etc. your default desktop environment.)
Explanation
update-alternatives creates, removes, maintains and displays information about the symbolic links comprising the alternatives system. The alternatives system is a reimplementation of the Debian alternatives system. It was rewritten primarily to remove the dependence on perl; it is intended to be a drop in replacement for Debian’s update-dependencies script. This man page is a slightly modified version of the man page from the Debian project.
 It is possible for several programs fulfilling the same or similar functions to be installed on a single system at the same time. For example, many systems have several text editors installed at once. This gives choice to the users of a system, allowing each to use a different editor, if desired, but makes it difficult for a program to make a good choice of editor to invoke if the user has not specified a particular preference.
The alternatives system aims to solve this problem. A generic name in the filesystem is shared by all files providing interchangeable functionality. The alternatives system and the system administrator together determine which actual file is referenced by this generic name. For example, if the text editors ed and nvi are both installed on the system, the alternatives system will cause the generic name /usr/bin/editor to refer to /usr/bin/nvi by default. The system administrator can override this and cause it to refer to /usr/bin/ed instead, and the alternatives system will not alter this setting until explicitly requested to do so.
The generic name is not a direct symbolic link to the selected alternative. Instead, it is a symbolic link to a name in the alternatives directory, which in turn is a symbolic link to the actual file referenced. This is done so that the system administrator’s changes can be confined within the /etc directory: the FHS (q.v.) gives reasons why this is a Good Thing.
When each package providing a file with a particular functionality is installed, changed or removed, alternatives is called to update information about that file in the alternatives system. alternatives is usually called from the %post or %pre scripts in RPM packages.
It is often useful for a number of alternatives to be synchronised, so that they are changed as a group; for example, when several versions of the vi editor are installed, the man page referenced by /usr/share/man/man1/vi.1 should correspond to the executable referenced by /usr/bin/vi. alternatives handles this by means of master and slave links; when the master is changed, any associated slaves are changed too. A master link and its associated slaves make up a link group.
Each link group is, at any given time, in one of two modes: automatic or manual. When a group is in automatic mode, the alternatives system will automatically decide, as packages are installed and removed, whether and how to update the links. In manual mode, the alternatives system will not change the links; it will leave all the decisions to the system administrator.
Link groups are in automatic mode when they are first introduced to the system. If the system administrator makes changes to the system’s automatic settings, this will be noticed the next time alternatives is run on the changed link’s group, and the group will automatically be switched to manual mode.
Each alternative has a priority associated with it. When a link group is in automatic mode, the alternatives pointed to by members of the group will be those which have the highest priority.
When using the –config option, alternatives will list all of the choices for the link group of which given name is the master link. You will then be prompted for which of the choices to use for the link group. Once you make a change, the link group will no longer be in auto mode. You will need to use the –auto option in order to return to the automatic state. Read the complete man page here
It is possible for several programs fulfilling the same or similar functions to be installed on a single system at the same time. For example, many systems have several text editors installed at once. This gives choice to the users of a system, allowing each to use a different editor, if desired, but makes it difficult for a program to make a good choice of editor to invoke if the user has not specified a particular preference.
The alternatives system aims to solve this problem. A generic name in the filesystem is shared by all files providing interchangeable functionality. The alternatives system and the system administrator together determine which actual file is referenced by this generic name. For example, if the text editors ed and nvi are both installed on the system, the alternatives system will cause the generic name /usr/bin/editor to refer to /usr/bin/nvi by default. The system administrator can override this and cause it to refer to /usr/bin/ed instead, and the alternatives system will not alter this setting until explicitly requested to do so.
The generic name is not a direct symbolic link to the selected alternative. Instead, it is a symbolic link to a name in the alternatives directory, which in turn is a symbolic link to the actual file referenced. This is done so that the system administrator’s changes can be confined within the /etc directory: the FHS (q.v.) gives reasons why this is a Good Thing.
When each package providing a file with a particular functionality is installed, changed or removed, alternatives is called to update information about that file in the alternatives system. alternatives is usually called from the %post or %pre scripts in RPM packages.
It is often useful for a number of alternatives to be synchronised, so that they are changed as a group; for example, when several versions of the vi editor are installed, the man page referenced by /usr/share/man/man1/vi.1 should correspond to the executable referenced by /usr/bin/vi. alternatives handles this by means of master and slave links; when the master is changed, any associated slaves are changed too. A master link and its associated slaves make up a link group.
Each link group is, at any given time, in one of two modes: automatic or manual. When a group is in automatic mode, the alternatives system will automatically decide, as packages are installed and removed, whether and how to update the links. In manual mode, the alternatives system will not change the links; it will leave all the decisions to the system administrator.
Link groups are in automatic mode when they are first introduced to the system. If the system administrator makes changes to the system’s automatic settings, this will be noticed the next time alternatives is run on the changed link’s group, and the group will automatically be switched to manual mode.
Each alternative has a priority associated with it. When a link group is in automatic mode, the alternatives pointed to by members of the group will be those which have the highest priority.
When using the –config option, alternatives will list all of the choices for the link group of which given name is the master link. You will then be prompted for which of the choices to use for the link group. Once you make a change, the link group will no longer be in auto mode. You will need to use the –auto option in order to return to the automatic state. Read the complete man page here
Thanks for reading.
update-alternatives creates, removes, maintains and displays information about the symbolic links comprising the alternatives system. The alternatives system is a reimplementation of the Debian alternatives system. It was rewritten primarily to remove the dependence on perl; it is intended to be a drop in replacement for Debian’s update-dependencies script. This man page is a slightly modified version of the man page from the Debian project.
The alternatives system aims to solve this problem. A generic name in the filesystem is shared by all files providing interchangeable functionality. The alternatives system and the system administrator together determine which actual file is referenced by this generic name. For example, if the text editors ed and nvi are both installed on the system, the alternatives system will cause the generic name /usr/bin/editor to refer to /usr/bin/nvi by default. The system administrator can override this and cause it to refer to /usr/bin/ed instead, and the alternatives system will not alter this setting until explicitly requested to do so.
The generic name is not a direct symbolic link to the selected alternative. Instead, it is a symbolic link to a name in the alternatives directory, which in turn is a symbolic link to the actual file referenced. This is done so that the system administrator’s changes can be confined within the /etc directory: the FHS (q.v.) gives reasons why this is a Good Thing.
When each package providing a file with a particular functionality is installed, changed or removed, alternatives is called to update information about that file in the alternatives system. alternatives is usually called from the %post or %pre scripts in RPM packages.
It is often useful for a number of alternatives to be synchronised, so that they are changed as a group; for example, when several versions of the vi editor are installed, the man page referenced by /usr/share/man/man1/vi.1 should correspond to the executable referenced by /usr/bin/vi. alternatives handles this by means of master and slave links; when the master is changed, any associated slaves are changed too. A master link and its associated slaves make up a link group.
Each link group is, at any given time, in one of two modes: automatic or manual. When a group is in automatic mode, the alternatives system will automatically decide, as packages are installed and removed, whether and how to update the links. In manual mode, the alternatives system will not change the links; it will leave all the decisions to the system administrator.
Link groups are in automatic mode when they are first introduced to the system. If the system administrator makes changes to the system’s automatic settings, this will be noticed the next time alternatives is run on the changed link’s group, and the group will automatically be switched to manual mode.
Each alternative has a priority associated with it. When a link group is in automatic mode, the alternatives pointed to by members of the group will be those which have the highest priority.
When using the –config option, alternatives will list all of the choices for the link group of which given name is the master link. You will then be prompted for which of the choices to use for the link group. Once you make a change, the link group will no longer be in auto mode. You will need to use the –auto option in order to return to the automatic state. Read the complete man page here
Thanks for reading.
Thanks for reading.
No comments:
Post a Comment