Kali Linux add PPA repository add-apt-repository
A Personal Package Archive (PPA) is a special software repository for uploading source packages to be built and published as an APT repository by Launchpad or a similar application. While the term is used exclusively within Ubuntu, Launchpad host Canonical envisions adoption beyond the Ubuntu community.
Debian allows users to add and use PPA repositories by an application named add-apt-repository however, Kali Linux didn’t include this in their default package list. With Kali, because this is a special purpose application and certain modifications were made to make it work for what it does best (Penetration Test), there’s a chance that by adding untested and unsupported PPA repositories and application you might end up breaking your installation.
However, PPA is a powerful tool to have and a lot of the specific applications that are not available in repositories are available via PPA repositories. Users should take extra care before adding unknown and random repositories as it might very well break other things. I mean, how do you know the PPA owner didn’t add some harmful code in their system? Generally, you don’t. Then again, how do you know that Linux Kernel doesn’t have something that’s spying on your activity? But I guess that doesn’t matter, your ISP would be happy enough to hand over your online activity to NSA anyway … I could go on and on, but let’s not waste more time and move to actual post “Kali Linux add PPA repository add-apt-repository” .. so here goes ..
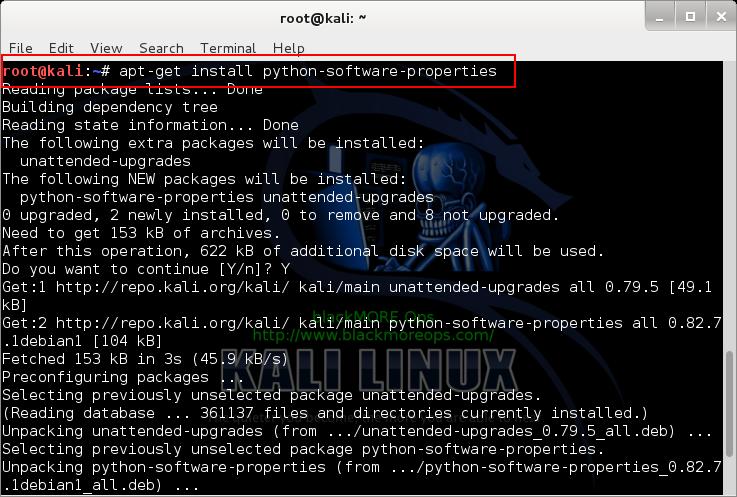
Step 1: Install required applications
First we install Python Software properties package.
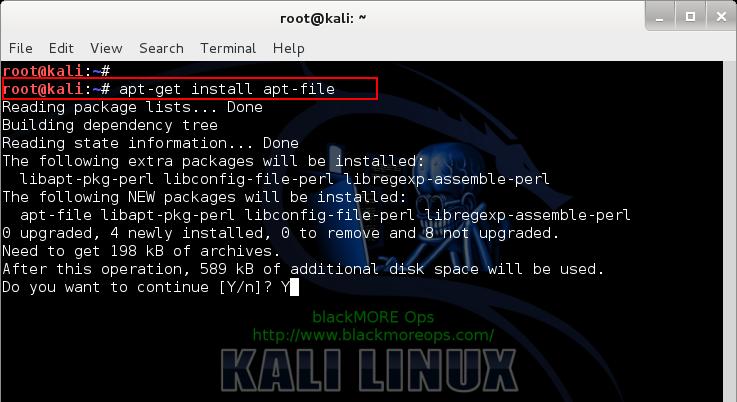
Next we install
Update .
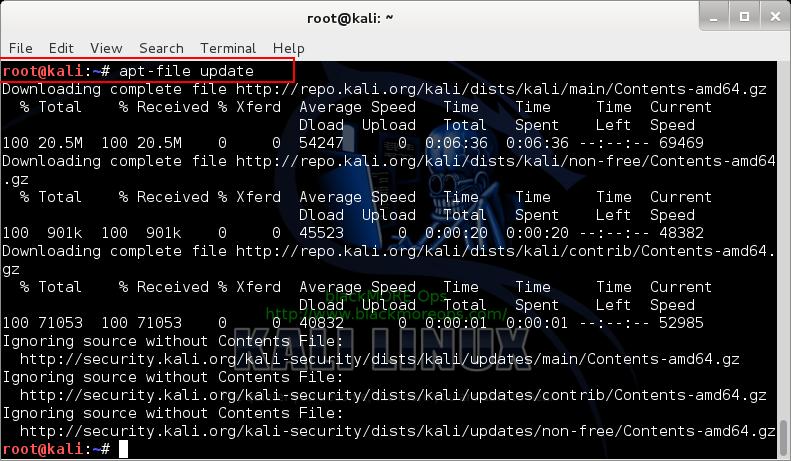
This takes a while, so in case your apt-file update is SLOW, you might want to try and fix that as well. (Note that I got in my file instead of .)
Once is complete, you should be able to search for it.
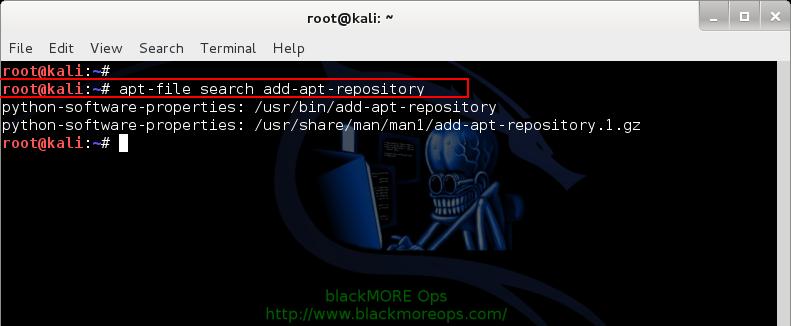
Your output should look similar to this:
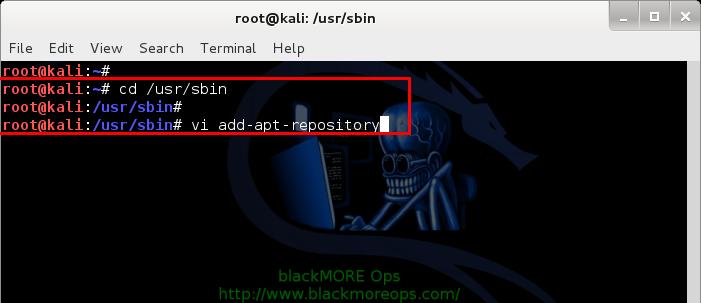
Step 2: Use our own code for add-apt-repository
The default application located in () works for Debian. So if you’re using Kali, chances are it won’t work. There’s a nice fix for that which I will add at the bottom of this post, (try them on VirtualBox if you feel like). But I found we can just mimic to make work.
Add the following code and save the file.
Note: In this line I’ve used. You can try to use , or as per your choice.
Now and the file.

Step 3: Adding a PPA repository via add-apt-repository in Kali Linux
Now that we added the correct code, we can use to add a PPA repository. I tried the following to add themes and custom icons in Kali Linux.
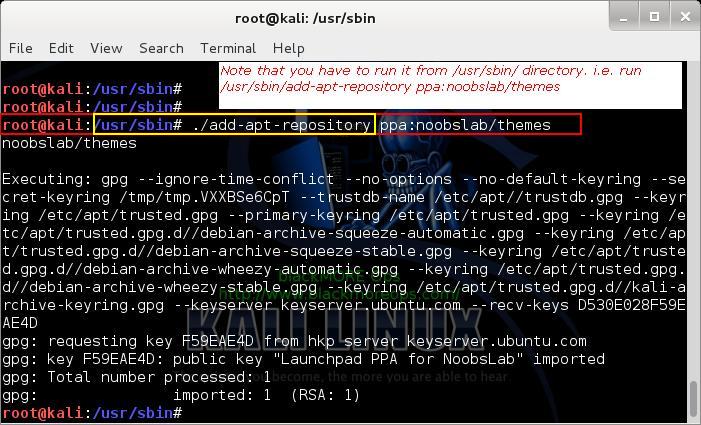
Once you’ve added a PPA repository via in Kali Linux, you need to update your package list.
You’ll see that your package list is now including PPA repository.
Step 4: Testing
Now that we have added to add PPA repository in Kali Linux, we can try to add some themes and custom icons. To keep things clean, I’ve moved this part in a different describing adding custom themes and icons in Kali Linux.
Step 5: Advanced Way
(Continued from Step 2: Paragraph 1)
In Step 2, paragraph 1, I pointed that we need to use our own code to use . Following is a way to bypass that and useby modifying your Distribution ID. I again advise that you try this part in Virtual Box so that you can roll back your changes.
Step 5.a Install Python Software Properties:
Install Python Software properties package.
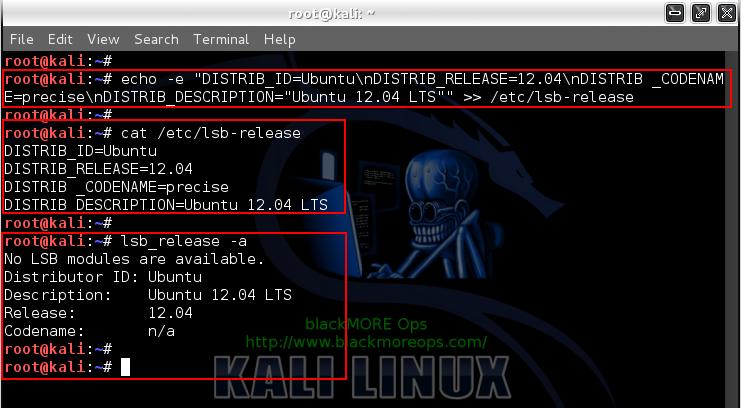
Step 5.b Change Distribution ID, Release, Codename and Description
Change your Distribution ID to Ubuntu, Release to 12.04, Codename to Precise and Description to Ubuntu 12.04 LTS.
DISTRIB_ID=Ubuntu
DISTRIB_RELEASE=12.04
DISTRIB_CODENAME=precise
DISTRIB_DESCRIPTION=”Ubuntu 12.04 LTS”
DISTRIB_RELEASE=12.04
DISTRIB_CODENAME=precise
DISTRIB_DESCRIPTION=”Ubuntu 12.04 LTS”
UPDATE: 27/02/2014 – Added code for Ubuntu Oneiric 11.10
DISTRIB_ID=Ubuntu
DISTRIB_RELEASE=11.10
DISTRIB_CODENAME=oneiric
DISTRIB_DESCRIPTION=”Ubuntu 11.10″
DISTRIB_RELEASE=11.10
DISTRIB_CODENAME=oneiric
DISTRIB_DESCRIPTION=”Ubuntu 11.10″
That mean’s now you can either use Precise or Oneiric codes as you feel like.
Now you should be able to add PPA just like normal.
Step 5.c Add PPA Repositories
Add PPA repositories using usual
Step 5.d Install something (i.e.Skype?)
Now we can install Skype..
Step 5.e Rollback changes
No change is much good without a rollback strategy.
To rollback your changes to Distribution ID, Release, Codename and Description, do the following,
And to confirm, do another
Output:
HUH .. GOTCHA …..
Just kidding… You don’t actually have to do it (well you could, but what’s the point to making things complicated). You could just delete file that was created in Step 5.e.
We again do antther to confirm.. See screenshot below:
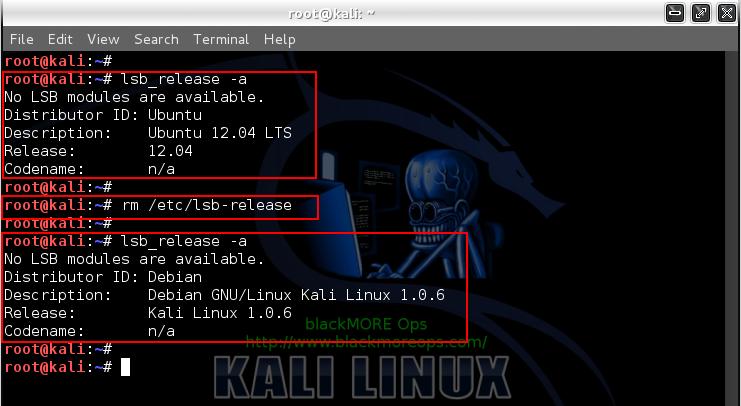
Both ways works, but I prefer the second way where you delete file. This file didn’t exist until we ran Step Step 5.e. So by deleting this file it doesn’t break or damage anything. So yes, just delete that file after you’ve installed whichever PPA you want.
Conclusion
As I’ve pointed in my first paragraph that by adding PPA repositories, you might break your system, so I will add a disclaimer here…
Disclaimer: This guide shows how to add PPA Repositories using add-apt-repository in Kali Linux that is usually not recommended. Readers should know how to repair their system and try these in Virtual Environment to avoid accidental breaks. We take no responsibility. Like Linux itself, you use these information’s as it is.
Thanks for reading.
No comments:
Post a Comment